How to fix an air mattress?
Air mattresses or airbeds are one of the most useful inventions made by man. It is a space-saving and affordable alternative to a regular bed.
Having an air mattress can come in handy when managing guests. It is also ideal for people living away from home for job purposes. Instead of investing in a regular bed, you can simply get an air mattress.
Different brands are claiming to offer quality air mattresses. But even the best air mattress is not immune to wear and tear. Over time, it may get leaks and tears. But the good thing is it is fixable. Instead of buying a new air mattress, you can fix your old one and save money.
Now the question is how you fix a hole or leak in an air mattress.
Well, there are many ways to cover the hole. From air mattress patch kits to nail polish, you can try a variety of different methods.
How to fix a hole in an air mattress?
As mentioned before, there are multiple ways to fix it. If you are looking for the most effective ways to fix your air mattress, you are in the right place. In the post below, we are going to share with you some of the best solutions to follow. So without wasting time, let’s get into the details.
Preparations needed:
Regardless of the method you choose, you need to first prepare your air mattress. Here are the steps you need to follow:
- Find the leak
Now try to hear the sound of the air coming out of your air mattress. If this doesn’t work, prepare a mixture of water and dish soap and spray it all over the mattress. The leaking air will form bubbles. This will help you to locate the hole without much effort.
Once you find the leak, mark it using a marker or pen. You need to let your airbed dry before moving onto the next step.
- Deflate the air mattress
- Scrub the mattress
You can do the scrubbing using sandpaper. However, you shouldn’t rub it too vigorously, or else you will end up damaging the mattress. This is why you are advised to use soft sandpaper and not harsh ones.
Once you are done with the above steps, your air mattress is ready to be fixed. We have listed five simple methods following which you can fix the leak.
-
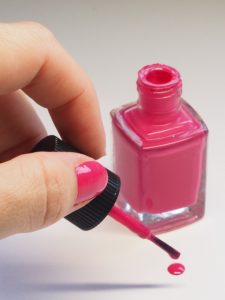
Fixing an air mattress with nail polish
How to fix a hole in an air mattress with nail polish? If you are wondering how that is possible, we are here to provide all the details you need to know.
Using nail polish to fix an air mattress leak is perhaps the most creative solution you can try. This method can help you to fix a leak completely. But you should be informed that it is a temporary solution. Once the nail paint dries, it loses its viscosity. As a result, it may fail to withstand continuous deflations/inflations for too long.
To fix your air mattress leak with nail polish, you need to do the following steps:
- Take a nail polish of any colour and apply a thin layer of it on the punctured area. This will work as a primer and will form a protective layer over the leak.
- Once you apply the nail paint, don’t move the airbed much while it’s drying. This may break the seal.
- Apply as many coats as you want to make it thick. Applying up to 6-7 layers of nail paint would be ideal. The thick film will last longer and will hold the air inside.
-
Fixing a blow-up bed with super glue
After nail polish, we have another way to fix your airbed. This method is better than using nail polish and will also last longer.
Using superglue you can fix a thin and small leak with two edges that need to adhere together. For example, a leak made with a knife or a scissor.
Well, there are two ways to fix your mattress leak using superglue.
The first way is to use super glue as an adhesive for a previous patch method which we will be discussing in the next section. This is an effective way to fix an air mattress leak.
The second way is to just squeeze the superglue above the hole without using any patches. This is an easier way but may not be as effective as the patch and superglue method. The glue will form a cover over the leak and will stop the air from coming out. To get better results, you should apply the glue in stitch-like motions.
You need to make sure that you create a thick layer over the hole. This is why applying multiple layers of glue is needed. After the first layer dries, repeat the entire thing. Once you are done applying superglue, blow the mattress and check whether the leak is fixed or not.
Superglue is considered to be a good method for fixing a mattress. Let’s say you are camping outdoors. In such conditions, you may not have your patch kit with you. So you can use superglue to fix the airbed. It’s a more durable solution than nail polish.
“How to fix a hole in an air mattress without a patch?” For those wondering this can try this method. It works pretty well.
-
Use a DIY patch kit
If you are looking for a more permanent solution to fix your blow-up bed, then we have the best solution for you. Using a DIY patch kit is possibly the easiest way to cover a hole in your air mattress. All you have to do is stick a patch to the punctured area.
Some air mattresses are provided with a patch kit. In case, your mattress came without it, no worries, we have got you covered. In this section, we will teach you how to make a DIY patch kit for your airbed.
You can use any rubber material or plastic to make the patch. Things you can use:
- pool liner
- small piece of a shower curtain
- piece of inner bike tire which is made of soft rubber
Once you get your patch material, here is what you have to do:
- At first, cut the material and take only the amount you need. The patch you are cutting should be big enough to cover the entire leaking area.
- To create a good seal make sure the patch spreads an inch or two on each side.
- In the next step, you need to decrease the airbed surface. For this, you will need a nail polish remover. You can also use rubbing alcohol if you want. Degreasing will remove any lipid residue on the surface so that the patch can adhere to the airbed properly.
- Now you need to apply glue. Follow the instructions given on the glue bottle which may differ based on the type of glue you are using. For instance, some adhesives are required to be applied to both contacting surfaces. But others can be applied to either of the contacting surfaces. To create a secure seal, use a good amount of glue. This will make the seal tight.
- Once you apply the glue, press it down with your hands after positioning the patch in the right place. You can also use something heavy to press the patch. Hold it for a few minutes for the glue to set.
- Now let the airbed dry overnight. Using it right away can loosen the seal.
- Inflate the air mattress and check the results the next morning. The glue should have dried by now.
Well, now you know how to patch an air mattress. It is the best way to fix a leaky area in an airbed. It is better than using nail polish or super glue.
-
Try marine goop glue
The next method you can try is the Marine Goop glue method. For those who don’t have an idea, marine goop is also known as amazing goop. This is one of the strongest adhesives you will find in the market.
There are many advantages of using Marine Goop. Unlike regular glue, it is UV resistant and waterproof. The best thing about it is that it can be used as a sealant. This is why it makes a good choice for fixing leaks.
Many of you must be using marine goop for the first time. To help you out, we have provided the steps below.
- The first thing you need to do is sand the surface of the airbed and degrease it. You can use soft sandpaper for the step. This is important because Marine Goop forms a secure seal on a rough surface. However, you shouldn’t rub the surface too hard. This may damage your airbed.
- Now wear your rubber gloves to protect your hands.
- Take an art brush or an old toothbrush to apply the adhesive.
- Once the sanding is done, apply a thin layer of Marine Goop on the leaky area. You need to cover the entire hole while leaving an inch or two around the hole.
- Let the sealant dry. It takes at least 24 hours for the sealant to cure. However, the duration may vary based on the temperature or the climate.
Marine Goop glue is another great way of fixing a leak in an airbed. This method is as effective as the patch kit one. But make sure to protect your hands while using marine goop. It is extremely strong and also not good for your skin.
-
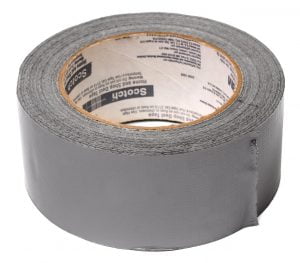
Use a duct tape
The last and final method we have is the duct tape method. If you don’t have a patch kit, you can use this method to fix your air mattress. This is a quick method and doesn’t require any adhesive.
To give you a good idea, we have laid down the steps below.
- At first, you need to cut a piece that is large enough to cover the leak. Make sure that it spread and covers some space around the punctured area.
- Now apply the cut patch to the degreased surface.
However, you should be informed that this method is not a permanent one. The glue on the duct tape is not going to last for a long time. Over time, it will lose its grip and the leak will be once again exposed. When that happens you will have to re-patch it again.
If you want a more permanent solution, then you should get a DIY patch kit for your airbed. Out of all the five methods, the patch kit one is the best as it provides a long-term solution.
Now that you know all the possible methods of fixing an airbed leak, you should be able to do it on your own. This will help you save money as you don’t have to buy a new one. However, if your mattress gets multiple leaks or bigger holes, then you may have to replace it with a new one. But most airbeds are durable and lasts for a long time.
Tips To Maintain Your Air Mattress
Prevention is better than cure, they say. Air mattresses are delicate products. One hard prick and they are gone. This is why you should keep your airbed in good condition.
Maintaining your air mattress from day one can save you the trouble of fixing it. If you are using an airbed for the first time, we have got some tips for you. By following these tips, you can keep your airbed from getting any leaks or damage.
Here you go with the details:
-
Check your surroundings
Before placing your airbed on the floor make sure you check your surroundings. You need to keep it away from stuff that can pop it. Things such as a sharp stone or a needle can deflate your airbed. So you need to be very careful while using it.
The best thing to do would be to keep your floor clean. Before laying your air mattress, vacuum your floor nicely. This will remove any sharp debris from the floor. Just so you know an airbed can get damaged by heat as well. So make sure you keep it away from heat vents, heaters, or campfires.
-
Check your airbed thoroughly
When you go to the store to get an air mattress make sure you inspect it thoroughly. Inflate it in the store and check if it has any manufacturing defect or leaks. After all, you wouldn’t want your money to go to waste.
Once you bring the airbed home, you should store it nicely someplace safe. If you are using it after a long time, check it after taking it out from the storage. Spread out the deflated mattress on the floor and inspect it for any leaks or damage. You should also look for any signs of mold which may have grown because of the humid weather. Once you know that your mattress is in good condition, you can inflate it.
-
Don’t inflate beyond capacity
Every airbed can be inflated to a certain capacity. The moment you try to cross the limit, it will pop. This is why it is important to fill it with the right amount of air. But at the same time, it shouldn’t be underinflated either as it creates uneven weight distribution which is uncomfortable to sleep on.
Over-inflating your airbed will put stress on the material and seams which can cause it to leak. So you need to be very careful when inflating it. It is normal for your airbed to lose some air when sleeping on it. Also, the air pump you use should be free of moisture or it can lead to bacteria build-up inside you’re air chambers in yours. You should inflate your mattress to the extent that it shouldn’t have any visible creases.
So these are the three important things you should keep in mind to extend the life of your air mattress.
An air mattress is one of the best space-saving solutions you can have. You can either use it for yourself or your guests. But just like everything else even an air mattress will get damaged. If you get leaks in your airbed, instead of throwing them away you can fix them using the mentioned methods in the post. Hopefully, you found this article useful.
FAQs

Fan of good quality sleeping and WordPress platform 🙂 Shopping is also my passion, that is why this article was created especially for you. Find out how you can sleep like a king and not overpay.


